
How to use ESLint to improve your workflow
ESLint ecosystem can be super handy for JS and TS codebases, but are you using it right? Keep reading to learn about useful ESLint rules and a get a little bit more out it.

This post is about the NextJS basics and a guide to build a simple website with this framework.
NextJS is a production-grade React framework. It permits the creation of all kinds of React applications, especially hybrid ones with static (SSG) and server-side components rendering (SSR). It is hostable on multiple hosting types, from a simple web server (for SSG) to a Node.js server for server-side rendering (SSR).
A question come: Why should I use NextJS to create my website?
Let’s see a few pros of constructing a website with the NextJS framework:
Now, we will learn how to build a website with NextJS. We’ll see the basics of the framework.
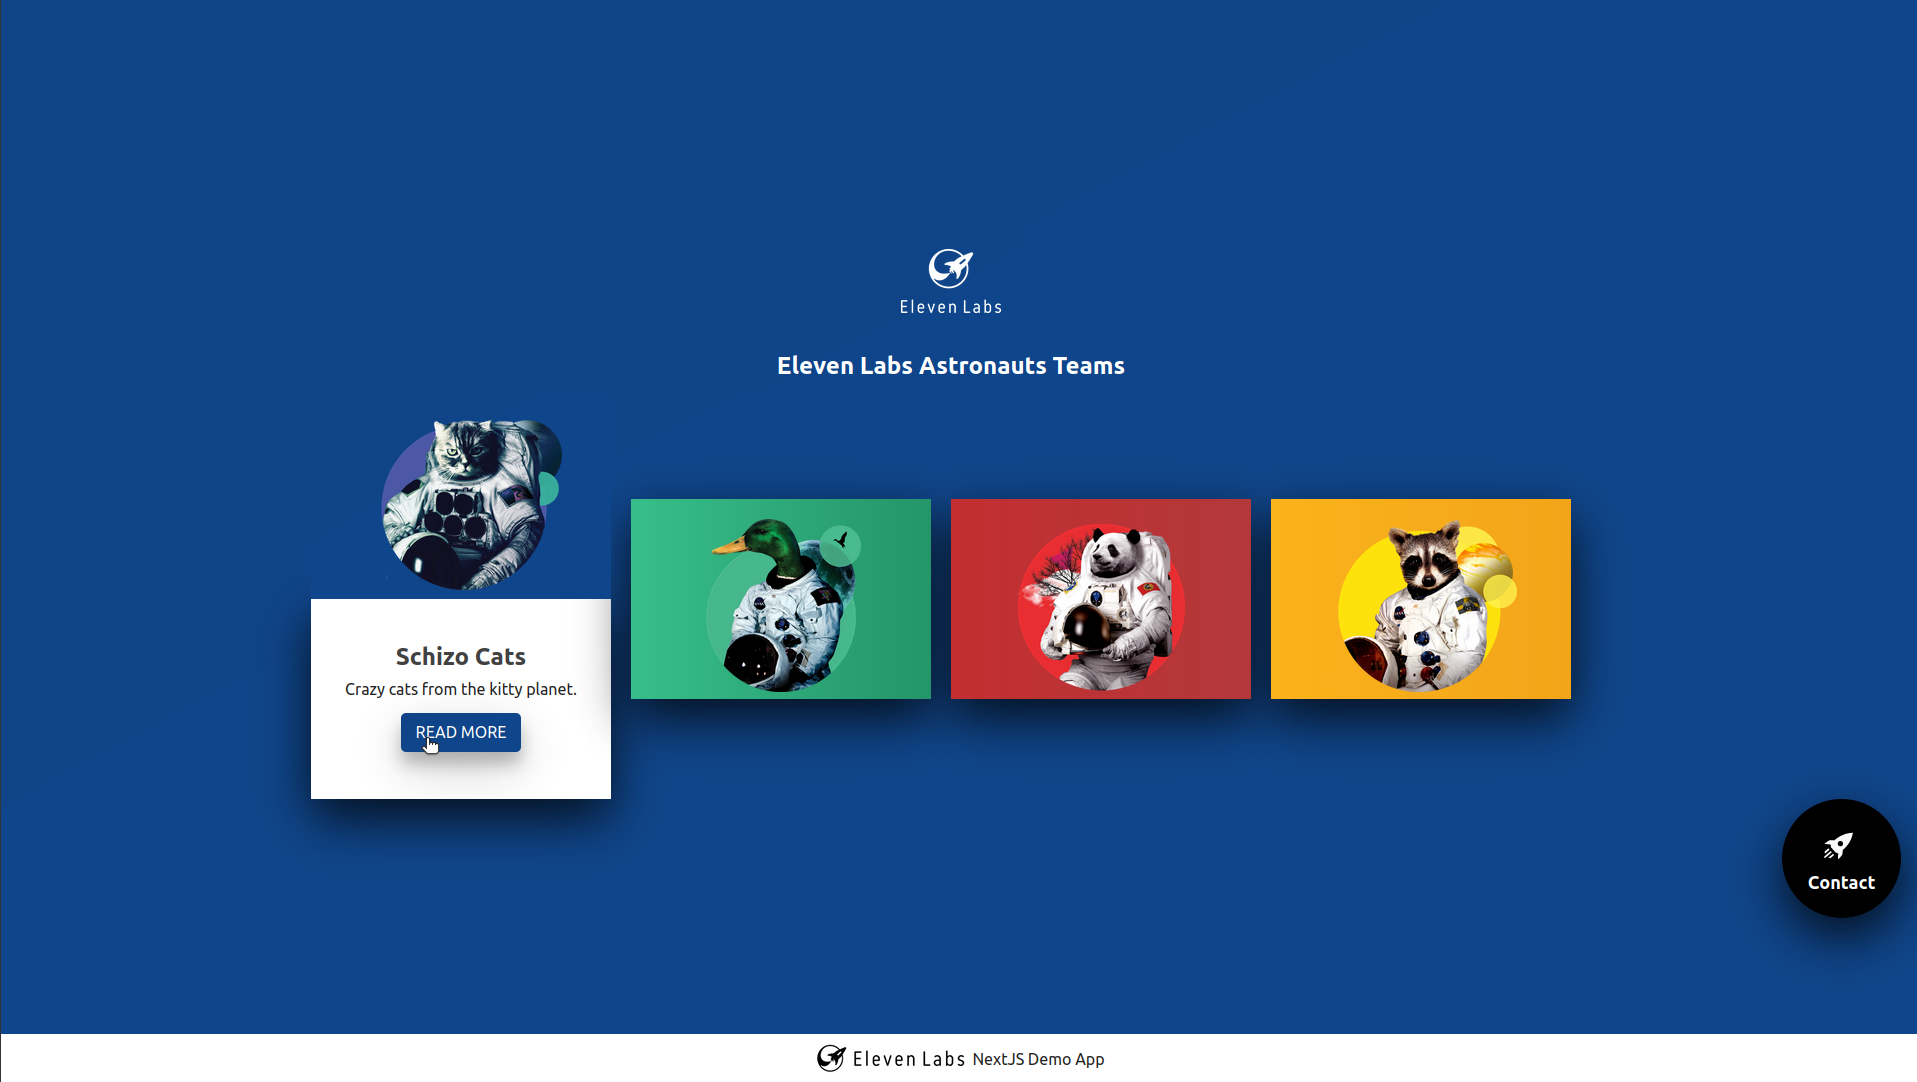
Let’s build a website about the astronauts' teams of Eleven Labs.
First, install NextJS and start the project.
To follow this tutorial, you need to clone the git example repository. We will construct the website page and learn how NextJS works. We will not construct the website pages content.
The repo contains all the components needed to construct the pages content. All reusable components are in components folder.
Clone the repo and checkout to the get-started branch:
git clone https://gitlab.com/Tonypunisher/astroteams.git
git checkout get-started
Note: To create a project from scratch, use the create-next-app package.
npx create-next-app astroteams
First of all, delete the pages/index.js content, to start from a blank page and not with the NextJS welcome page.
Now, we need to build our website layout, let's create a reusable React component and integrate it in the global NextJS App component to see it in each generated pages.
Note: all website pages are in the
pagesfolder.
First, create a components folder in the root folder:
mkdir components
Create the Layout component folder tree:
mkdir components/Layout
touch components/Layout/Layout.js
touch components/index.js
touch components/Layout.module.css
Let's add the Layout HTML code and add some styling to it:
components/Layout.js
// Libs
import PropTypes from "prop-types"
import Head from "next/head";
import { useRouter } from "next/router";

// Components
import { FlexContainer, ORIENTATION } from "../FlexContainer";
import { ElevenLabsLogo } from "../ElevenLabsLogo/ElevenLabsLogo";
import { SpaceCraftButton } from "../SpaceCraftButton";

// CSS Module
import styles from "./Layout.module.css";
import Image from "next/image";

export function Layout({ children: pageContent }) {
  const router = useRouter()
  const isHomePage = router.pathname === "/"

  const handleContactClick = (e) => {
    e.preventDefault()
    router.push("/contact")
  }

    return <div className={styles["main-container"]}>
    <Head>
      <title>AstroTeams</title>
      <meta name="description" content="Eleven Labs Astro Teams" />
      <link rel="icon" href="/favicon.ico" />
    </Head>

    <main className={styles.main}>
      <FlexContainer orientation={ORIENTATION.VERTICAL}>
        <ElevenLabsLogo />
        { pageContent }
      </FlexContainer>
      { isHomePage && <SpaceCraftButton onClick={handleContactClick}>Contact</SpaceCraftButton> }
    </main>

    <footer className={styles.footer}>
      <Image
        alt="Eleven Labs Logo"
        src="/logo-eleven-labs-large.png"
        objectFit="contain"
        width="150px"
        height="50px"
        priority
      />
      <div className={styles["footer__label"]}>NextJS Demo App</div>
    </footer>
  </div>
}

Layout.propTypes = {
  /**
   * Page content
  */
  children: PropTypes.node.isRequired,
}Note: don't forget to add the styling in the CSS module. Also, export your component in the index.js.
Now, add the component to the pages/_app.js:
// Components
import { Layout } from "../components/Layout"

// Global CSS
import "../styles/globals.css"

function MyApp({ Component, pageProps }) {
  return <Layout><Component {...pageProps} /></Layout>
}

export default MyApp
Now, each page generated from the pages folder uses the Layout, as we can see in our index page:
Let's add the HTML content for the index page.
Just add HTML content with a JSX template to have the page content:
// Libs
import Head from "next/head";
import { useRouter } from "next/router";

// Components
import { FlexContainer } from "../components/FlexContainer";
import { Card } from "../components/Card/Card";
import { Button } from "../components/Button"

// CSS Module
import styles from "../styles/Home.module.css";

export default function Home() {
  const router = useRouter()
  const handleTeamPageClick = (e, team) => {
    e.preventDefault()
    router.push(`/${team}`)
  }

  return (
    <>
      <h2>Eleven Labs Astronauts Teams</h2>
      <FlexContainer>
        <Card backgroundColorClass="blue-background" imagePath="/cats-logo.png" imageAlt="Eleven Labs Cats Team" title="Schizo Cats">
          <div className={styles["team-description"]}>
            <div className={styles["team-description__txt"]}>Crazy cats from the kitty planet.</div>
            <Button className="blue-background" onClick={(e) => handleTeamPageClick(e, "schizo-cats")}>READ MORE</Button>
          </div>
        </Card>
        <Card backgroundColorClass="green-background" imagePath="/ducks-logo.png" imageAlt="Eleven Labs Duck Team" title="Duck Invaders">
          <div className={styles["team-description"]}>
            <div className={styles["team-description__txt"]}>Ducks space invaders from Duck planet.</div>
            <Button className="green-background" onClick={(e) => handleTeamPageClick(e, "ducks-invaders")}>READ MORE</Button>
          </div>
        </Card>
        <Card backgroundColorClass="red-background" imagePath="/pandas-logo.png" imageAlt="Eleven Labs Pandas Team" title="Donut Factory">
          <div className={styles["team-description"]}>
            <div className={styles["team-description__txt"]}>Pandas who made some donuts from the Donuts planet.</div>
            <Button className="red-background" onClick={(e) => handleTeamPageClick(e, "donuts-factory")}>READ MORE</Button>
          </div>
        </Card>
        <Card backgroundColorClass="yellow-background" imagePath="/racoon-logo.png" imageAlt="Eleven Labs Racoon Team" title="Raccoons of Asgard">
          <div className={styles["team-description"]}>
            <div className={styles["team-description__txt"]}>Racoons guardian of the galaxy from the great Asgard planet.</div>
            <Button className="yellow-background" onClick={(e) => handleTeamPageClick(e, "asgard-racoons")}>READ MORE</Button>
          </div>
        </Card>
      </FlexContainer>
    </>
  )
}Note: don't forget to add the CSS rules. They are in the `styles/Home.module.css. All CSS modules for pages are in this folder.
The pages/index.js and components/Layout.js components contain redirections to other website pages, but they don't exist yet. Let's learn how to create these pages with NextJS.
First, we need a static page for contact. Static means the page/container doesn't receive any parameter. To create a /contact page, add a contact.js file with a React component returning an empty div. NextJS router will automatically create the page:
touch pages/contact.js
pages/contact.js:
// Components
import { PageCard } from "../components/PageCard"
import { FlexContainer, ORIENTATION } from "../components/FlexContainer"

export default function Contact() {
    return <>
    </>
}
Now we have an empty page for /contact. Just add the content and it is done:
// Components
import { PageCard } from "../components/PageCard"
import { FlexContainer, ORIENTATION } from "../components/FlexContainer"

export default function Contact() {
    return <>
        <h2>Contact Eleven Labs</h2>
        <PageCard>
            <FlexContainer orientation={ORIENTATION.VERTICAL}>
                <h3>Eleven Labs</h3>
                <div>PARIS</div>
                <div>15, avenue de la Grande Armée</div>
                <div>75116 PARIS</div>
                <div><a href="mailto:contact@eleven-labs.com">contact@eleven-labs.com</a></div>
            </FlexContainer>
        </PageCard>
    </>
}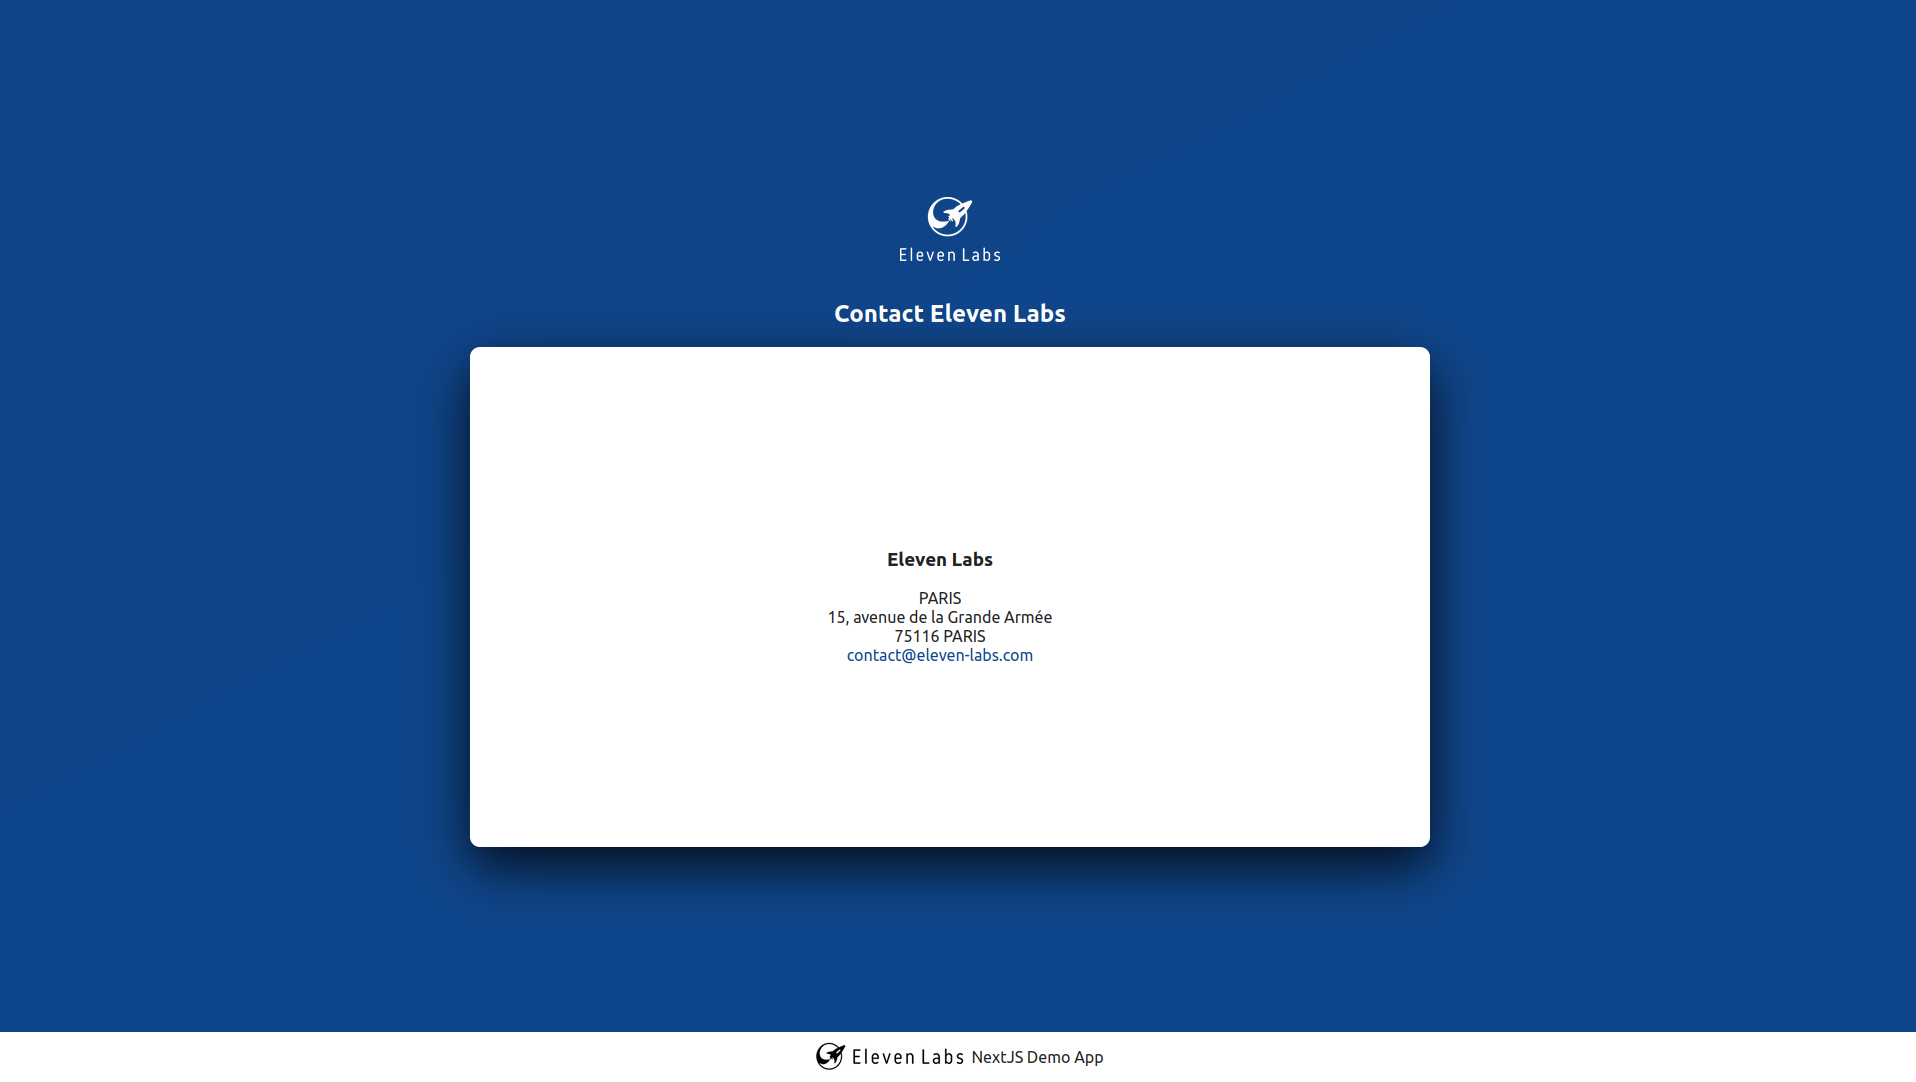
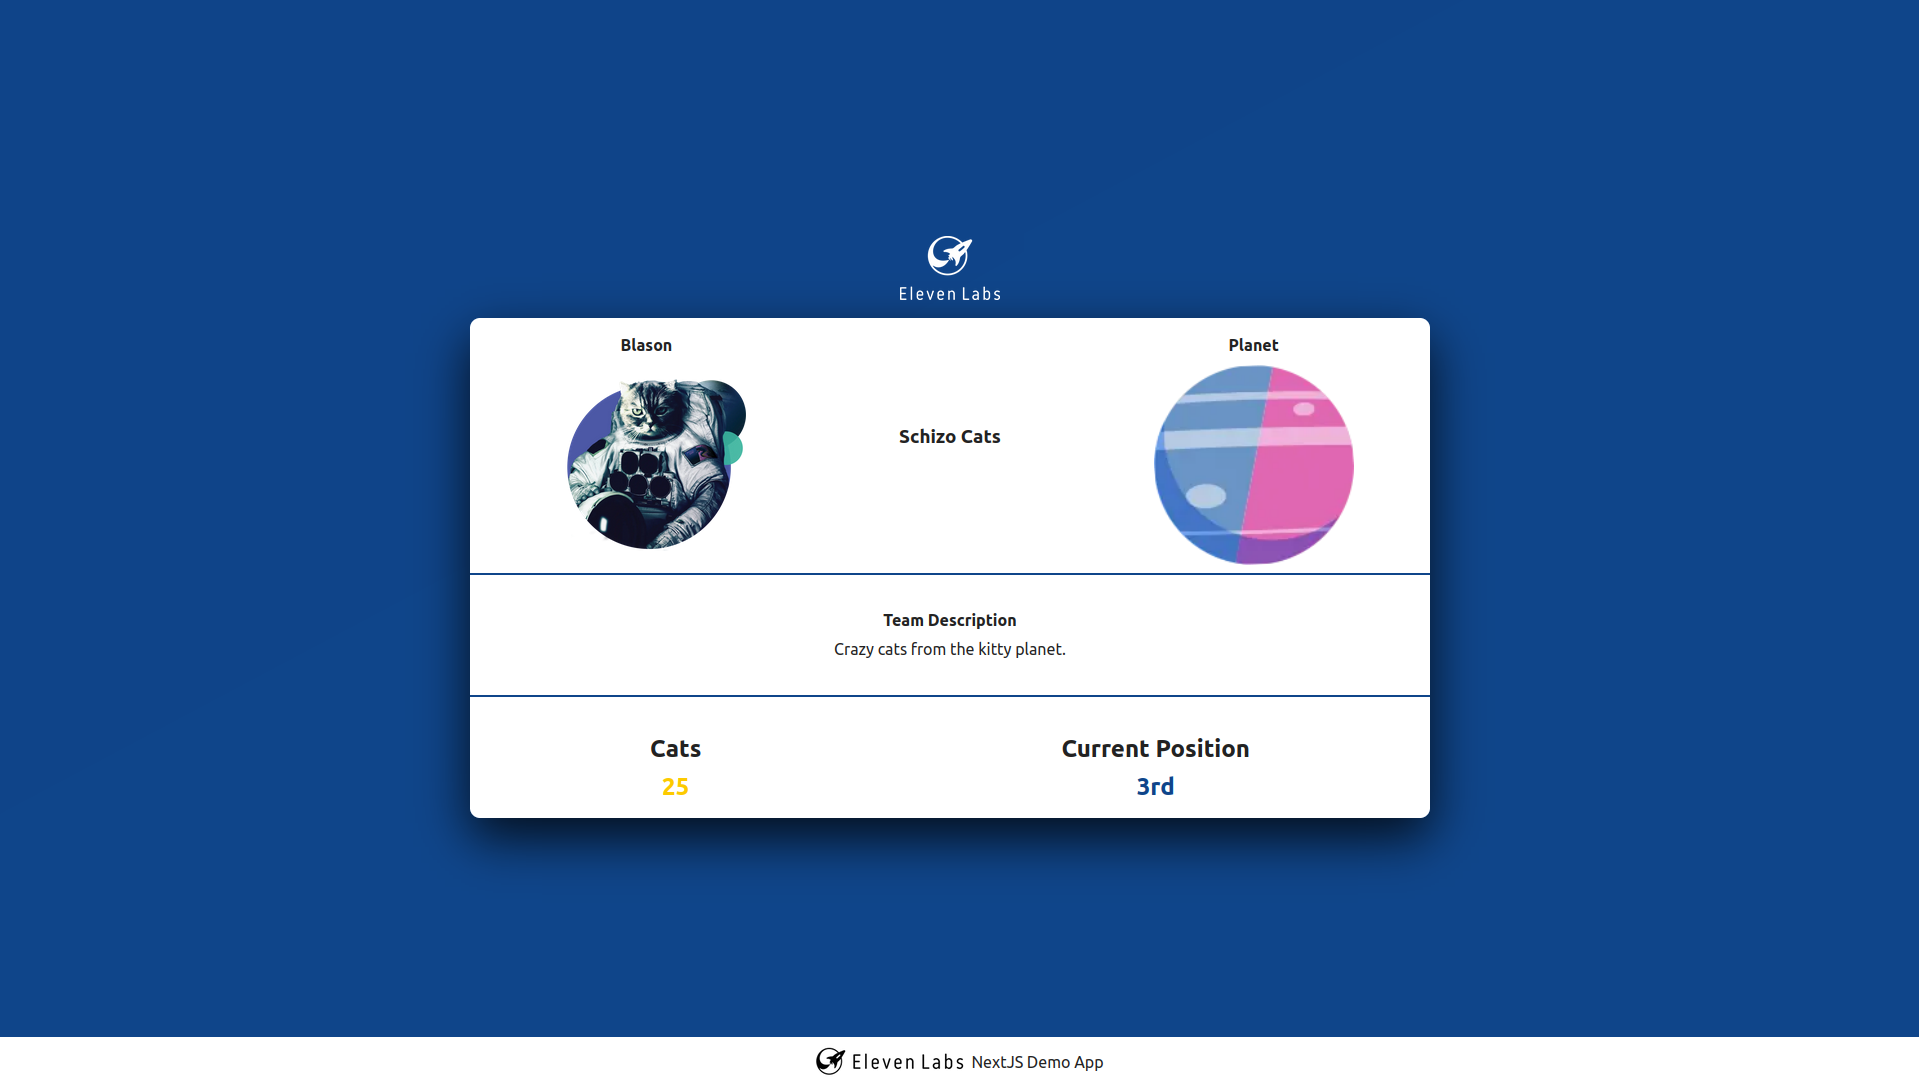
Now we have a contact page. The website needs one page for each astronaut's team. To do that, we will create a route with the team name as a parameter.
The NextJS router permits the creation of routes with parameters, like react-router. To do that, we have to create a file with a specific name pattern. To create a /<teamname> route, we need to create a pages/[team].js file.
Now we have our page with the team name as a parameter. To parse this parameter and pass it as a prop of the page/container, we need to create two functions:
Before adding these functions, let’s add the dynamic content for each page into a JSON file for our example:
pages/api/teams.json:
[
    { "name": "schizo-cats", "teamName": "Schizo Cats", "teamDescription": "Crazy cats from the kitty planet.", "teamImagePath": "/cats-logo.png", "teamPlanetPath": "/planet-skizo.png", "teamCounter": 25, "teamPosition": "3rd" },
    { "name": "ducks-invaders", "teamName": "Duck Invaders", "teamDescription": "Ducks space invaders from Duck planet.", "teamImagePath": "/ducks-logo.png", "teamPlanetPath": "/planet-ducks.png", "teamCounter": 20, "teamPosition": "2nd" },
    { "name": "donuts-factory", "teamName": "Donut Factory", "teamDescription": "Pandas who made some donuts from the Donuts planet.", "teamImagePath": "/pandas-logo.png", "teamPlanetPath": "/planet-pandas.png", "teamCounter": 25, "teamPosition": "4th" },
    { "name": "asgard-racoons", "teamName": "Raccoons of Asgard", "teamDescription": "Racoons guardian of the galaxy from the great Asgard planet.", "teamImagePath": "/racoon-logo.png", "teamPlanetPath": "/planet-racoon.png", "teamCounter": 20, "teamPosition": "1st" }
]
Let’s implement the getStaticPath based on the JSON data:
pages/[team].js:
export async function getStaticPaths() {
    const paths = teamsData.map(team => {
        return {
            params: { team: team.name }
        }
    })

    return { paths, fallback: false }
}
This function parses an array of pathnames based on the teams' names and returns them in an object. We add fallback: false to construct our pages only on the next build phase. If you add a new page, you have to rebuild the website.
Now we can parse the props for the team page:
pages/[team].js
export function getStaticProps({ params }) {
    const { teamName, teamDescription, teamImagePath, teamPlanetPath, teamCounter, teamPosition } = teamsData.find(team => team.name === params.team)

    return { props: { teamName, teamDescription, teamImagePath, teamPlanetPath, teamCounter, teamPosition } }
}
We find the content from the JSON file and construct the page props. Now let's create the page content:
pages/[team].js:
export default function Team({ teamName, teamDescription, teamImagePath, teamPlanetPath, teamCounter, teamPosition }) {
    return <TeamCard
        teamName={teamName}
        teamDescription={teamDescription}
        teamImagePath={teamImagePath}
        teamPlanetPath={teamPlanetPath}
        teamCounter={teamCounter}
        teamPosition={teamPosition}
    />
}
We pass our props to a component to render the page content. Now if you click on the read more button, you can see a team page:
Our website is finally ready to be published. To conclude this article, let's sum up some feedback about building this website.
Here's what we've learned building this small website:
Author(s)
You wanna know more about something in particular?
Let's plan a meeting!
Our experts answer all your questions.
Contact usDiscover other content about the same topic
ESLint ecosystem can be super handy for JS and TS codebases, but are you using it right? Keep reading to learn about useful ESLint rules and a get a little bit more out it.
You may not be using the React states optimally and I'll explain why
In this article we are going to cover how to set up i18next in your React app